Friday, March 30, 2012

Play date at the Villa | Los Angeles Portraits

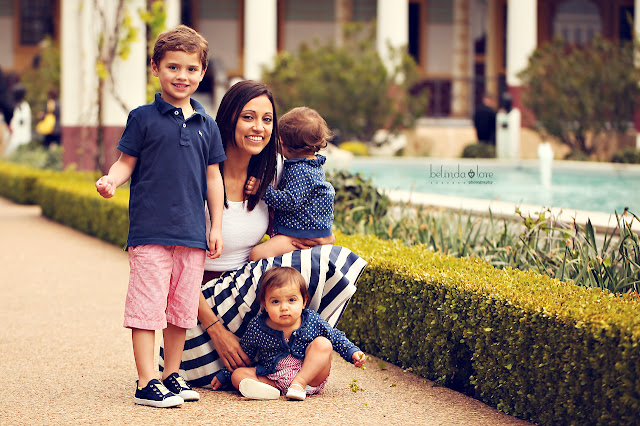
My friend Alexia is in visiting from out of state... She's a mommy of three adorable children & happens to be a fantastic photographer herself! For the past three years she's been running a successful photography business, Ty Bebe Photography, out of Souther California, and a couple of months ago moved out to Utah. If you're in Utah, you have to check her out!

As photographers, we usually don't get too many pictures with our own children, so Alexia & I wanted to do something about that. We headed out to the Getty Villa in Malibu for a play date and enjoyed a beautiful day with the kiddos.

Here are some of my fav's of Alexia, Tyson, Layla & Kira!


This is Layla... 


... Tyson ... 


... and Kira!


Alexia, your gorgeous!!


Looking forward to another play date next time your in town Alexia!

Hugs & kisses to you four from Emma and I :)

Have a wonderful weekend everyone!

Wednesday, March 28, 2012

Quote of the week | by Ralph Waldo Emerson


Follow your dreams & live a life full of satisfaction, even if it means to go on the path less taken. Scary? It can be, but it is good to step out pur your comfort zones if it brings improvement, right?

Happy Wednesday!


Friday, March 16, 2012

DYI Friday | Custom rosette onesie & felt bow headband

Happy Friday internet! Hope you've had a wonderful week & are now ready to have a wonderful weekend :)

Today we'll be learning how simple it is to personalize a t-shirt or in this case, a 'onesie'. Which by the way can be a great shower or birthday gift without breaking the bank. Let's just say the possibilities are endless!

For the past couple of weeks I've been looking to buy my baby girl a cute St. Patty's day shirt but haven't had much luck (pa-ra-pamp). So as I was browsing at Michaels I came across Wilton transfer paper. I've always heard great things about it and decided to try it out. The instructions come on the package & are really easy to follow.


Materials needed:

* transfer paper
* felt in your choice of color
* scrap fabric
* hot glue gun
* scissors
* braided elastic
* ink-jet printer
* iron
* t-shirt or onesie


No need to re-invent the wheel, I used a couple of tutorials from all over the internet but added touches of me & you can do the same:

 Craftcritique.com post explains transfer sheet instructions perfectly.
 little birdie secrets - fabric rosettes
 craftiness is not optional - felt bow

To the felt bow below I added a piece of lace to make it my own...


I made the rosettes out of scrap fabric I had - I never throw away scraps. 
* * * TIP: before printing on the transfer papers, make sure it's a mirrored image


 I think its safe to say Emma loves her shirt & headband as much as i do! What do you guys think?

If you love it don't forget to pin it to Pinterest!

xoxo

- Belinda

Thursday, March 8, 2012

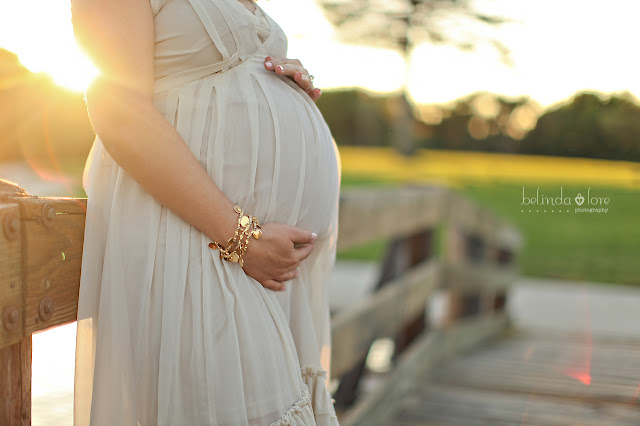
Jessica + Luis | Los Angeles Maternity Photography

Finally getting around to getting caught up from my leave & that's when I realized I had not blogged my cousins maternity session! 

I was soo excited to document my cousin Jessica's maternity. The baby was due in two weeks so I kept asking her if she needed a break or to sit, but no. Jess was feeling slight contractions (totally normal) but looked so relaxed that anyone would have thought "oh she has a ways to go." Wrong, baby Enrico made his entrance into this world the very next day! Yes, you read that correctly - the very next day! That's the one thing about being pregnant, it's soo unpredictable you just have to be ready on any given moment.  

Enrico was born a healthy baby boy on October 28th 2011 weighing 6 lbs 10 oz., 20 1/2 inches long - love him to pieces!

Anyway, here are my favorites from the session...


Enrico, your parents had no idea you were coming the very next day, 
but they were ready to hold you already!


Jessica, you look so beautiful, definitely glowing!


tiny shoes for the little boy :)


Jessica, you & Luis are wonderful parents to Enrico... May God continue to bless your little family!
xo

Friday, March 2, 2012

DIY Friday | Old picture frame into amazing chalkboard!

Finally its Friday! I love Fridays because it leads up to the best days of the week :) Not only is it Friday, but can you believe it's MARCH already!? Where has time gone? Seriously. 


Anyway, if you know me, you know I love home decor & crafting. And now that I'm blessed to be a stay at home mommy (thanks to my hard-working hubs), I now have more time to be crafty (while Emma naps). For the past couple of years, photography has been my only outlet for this creative side, but now the passion has been revived :) Ever since I worked on my daughters baby shower, it reminded me how fun it was & quickly became intrigued all over again by all the different things you can make with the most random supplies! I also got into sewing (made baby girl some blankets - image below)  which I'm still learning. Since then, I've been wanting to launch this new DIY series, but due to lack of time & energy (because my bundle of joy keeps me pretty busy) this project had been delayed.


Anyway, who here has a Pintrest account? From the day I signed up, I haven't been able to get off! It's soo addicting... the ideas on there are ENDLESS! It's like a little piece of heaven to me because I love to customize EVERYTHING :)


So every Friday I want to share Do It Yourself projects that will hopefully inspire you to think outside of the box & maybe get your hands a little dirty. As my daughter gets older I plan to incorporate her help as well, which I totally encourage you to involve your kiddos too... Some projects may be easier than others, but always fun! Maybe not the process itself, but when you see your finished project you'll feel very accomplished!!


*** I promise that future post will not have such a long intro, promise ;)

Ever wanted a lovely chalkboard frame? I know I search & search many stores when looking for one for Emma's babyshower.. I wish I would have known about this! I had to settle for a not-so-nice one from Michaels :/ but it did the job! So I got this idea off of Pintrest & I wanted to share this quick & easy way to make a fabulous chalkboard! Yes, easy. Let's get started!

LIST OF SUPPLIES NEEDED:
  1. Inexpensive picture frame (mine is an 8x10 I found at TJ Maxx)
  2. Primer
  3. Color spray paint of your choice
  4. Chalkboard spray paint 
  5. Antiquing glaze *optional*
  6. paint brushes *optional*
  7. Rag of disposable fabric *optional*

* TIP * - I suggest you purchase the paints & primer at a home improvement store like Home Depot, Lowe's or even Walmart because they are much more affordable than at craft stores - hey, every penny counts right? :)


Once you have your frame, remove the glass, backing & prepare your surface. Begin spraying with the primer first. Allow to dry. Then with the bottle of color, spray entire frame, I usually do two coats. While that is drying get the glass that came in the frame & spray it with your chalkboard paint. Again, allow to dry completely. When all is completely dry, I re-glued the backing with a hot glue gun. AND ta-daaa, you have your self a unique chalkboard!


***Next steps are totally optional


But because I'm into vintage stuff & I like my decor to look that way, I went an extra couple of steps to accomplish this... I used Valspar Antiquing glaze which you can get at your local Lowe's... At first, I thought paying $9 for this small bottle was alot, but a little goes a long way with this stuff!


* Note I'm no expert when it comes to using this stuff, but this is the method that has worked for me.
Once your paint is all dry on the frame, you get a dab of the glaze and begin brushing it on all over the frame. Directions say to allow to dry for at least 24 hours - I usually cannot wait that long, but just make sure it is really dry, I say a couple hours will do, then with the old rag begin to rub it off... If your paint is not dried well enough you can rub the paint right off! So be careful. 


Below is my finished product... what do you think? It can be used as a photography prop, party, home decor or whatever you like! I'll probably find a spot for mine around the house.


I would love to see if you go ahead and try out this project! Let me hear from you, don't be shy! :)

Have a wonderful weekend <3's
Pin It button on image hover